We made these for Teacher's Day back in September. I'm not one who remembers dates well and in addition to my ability to procrastinate, we panicked at the very last moment before we left for T's piano lesson.
I know presenting a gift to your teachers on Teacher's Day is not rule but still, it is nice to show your appreciation with something, be it big or small.
Obviously, it was too late to shop, the next best thing we could come up was something homemade. Hence, I decided to make this sweet little Fruit Pastry which I had bookmarked eons ago.
This is an easy recipe and with so many successful attempts by food bloggers, it sure is a lifesaver. I'm glad I chose this recipe and they looked really cute with the single heart shaped strawberry on it. They don't only look good but they taste fabulous too, In fact, I baked another batch for H's teachers the next day. Sar-kar...Lol.
You can hop over to HHB's blog for the recipe
It is a really wonderful tea cake.
Monday, 13 December 2010
famous fruit pastry

Wednesday, 11 November 2009
hand mixed orange cake
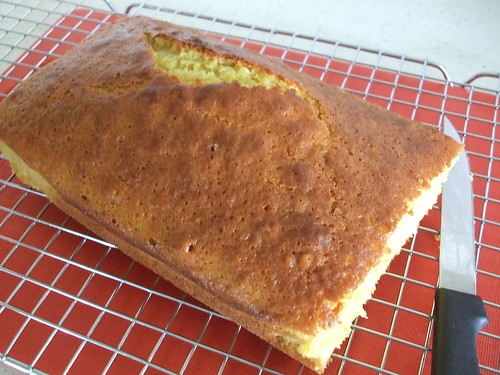
I have been going on a orange cake hunt ever since I had a crazily delicious slice in Frasers Hill earlier. This recipe requires no machine and almost like any basic muffin recipes, you simply mix the wet ingredients into the dry ones. Ta-dah! You're done. I'm quite pleased with the results, except that I feel the crumbs can be more fine. I think next time, I will substitute the oil for butter and use creaming method instead.
Orange Cake
100g Self raising flour
50g plain flour
20g brown rice cereal (I used 170g plain flour altogether)
1/2 tsp baking powder
1/2 tsp bicarbonate of soda (I used 1 tsp each due to the above changes)
3 eggs
150g castor sugar (I used 120g)
120ml corn oil
50g yogurt
1/2 tsp orange essence
1 tsp grated orange zest
60ml orange juice
Combine the flour, baking powder and soda in a bowl.
Combine eggs, sugar, oil and the rest of the ingredients. Stir into flour mixture until well blended.
Baking in a prepared loaf pan in a preheated oven at 175C for 35-40min. Stand for 10min before turning onto a wire rack to cool.
手拌式蛋糕 - Kevin Chai
Sunday, 6 September 2009
pandan kaya cake
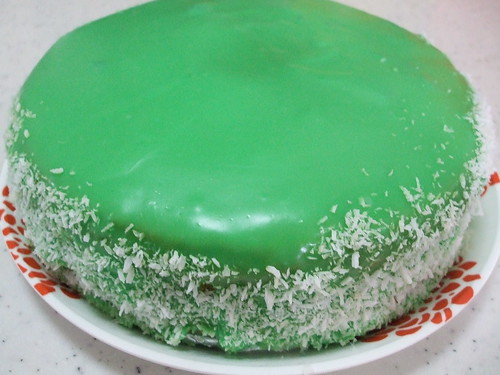
This cake brings back lots of 'exciting' memeories, which I will fondly cherish.
I learned this cake from a bakng class organised by Bt Batok Community Club many years back. Mdm Law, the instructor made it looked so easy and I had very little difficulty replicating it at home. Fast forward a few years later, I shared this recipe with some mommies in a parenting forum I frequent. This was my greatest 'mistake' made. Many of them attempted this recipe on a same Saturday night, my handphone rang non stop. Everyone encountered different problems, one said the kaya didn't thicken, another one reported that her cake broke into half when when she poured the kaya over. I wasn't expecting so many different outcomes and I really didn't know how to reply or solve their problems. Everyone was simultaneously reporting their results on the forum, like as if they are waiting their newborns to arrive. Funny yet stressful for me.
I'll still share the recipe here for those to want to try. I can only say, please do not pour the kaya over the cake when it (the cake) is still hot, it will break, no matter how careful you are. You may use your favourite sponge cake recipe instead.
pandan kaya cake
(this recipe is for 2 x 7" cake tin)
345g Optima flour (from Bake King)
2.1 tsp ovalette (stabilizer)
25oz water
6 eggs
2 tsp pandan paste (indonesian butterfly brand)
85g melted butter
1. Beat the flour with eggs until it thickens and pass the ribbon test.
2. Add in the ovalette and water and beat well.
3. Add in the pandan paste, make sure it is well mixed.
4. Add the melted butter and mix well.
5. Pour into 2 seven inch lined cake tin and baked at 180deg for 35 min.
Prepare the kaya after the cake is done and slightly cooled.
570ml water
200ml coconut milk
170g sugar
Half a packet of hoon kueh powder
1 tsp gelatine
1 tsp pandan paste
1. Stir all the ingredients together and boil over low heat.
2. Keep stirring until the mixture thickens.
3. Let the kaya cool slightly before icing the cake.
To assembly the cake.
Cut the cake across horizontally and sandwich the cake with a layer of kaya. Scoop some kaya into a measuring cup or any container with a beak. Slowly pour the kaya over the centre of the cake, with the back of a soup ladle, move in circular motion to spread the kaya and let it drip over the sides naturally. There will be quite a bit of wastage in order for the sides to be covered up evenly.
You can dust some dessicated coconuts on the sides to cover up any 'flaws'. I do that as my frosting skills is extremely lousy.
Let's hope nobody is seriously interested enough to try the recipe out. Some people suggested adding jelly powder into the kaya so that it will set easily. Personally, I feel, if jelly is used instead of hoon kueh powder, the bite will be very different, I don't want my kaya to taste 'hardened'.
Try at your own risk. Keke
Friday, 21 August 2009
brown banana cake

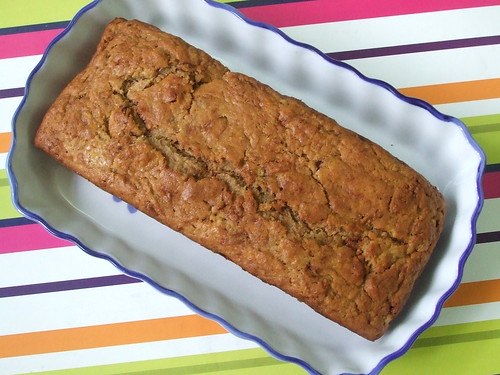
I love banana cakes and almost seldom reject any chances of trying out a new recipe. This recipe is taken from Pichet Ong's The Sweet Spot and since he claimed that this is the best banana cake ever, I have no reason not to try it.
The cake turns out to be very moist, almost limping and hard to hold in shape. I'm not really sure if it is the works of yogurt. Imagine a very light and moist banana bread.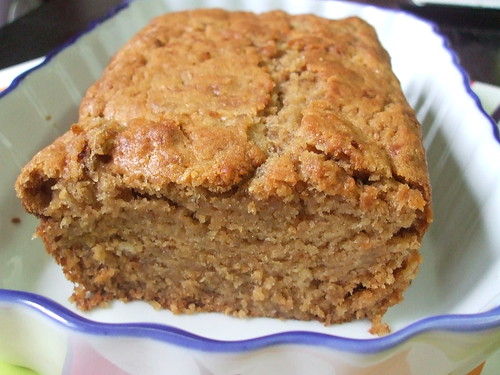
Banana Cake
1/3 cup butter (78g)
1 cup all purpose flour
1 tsp baking powder
1 tsp baking soda
1/4 cup honey
1/2 cup packed light brown sugar
1/2 tsp ground cinnamon
1/2 tsp salt
1 cup roughly mashed bananas
1/2 tsp vanilla essence
1 large egg
1/2 cup plain whole milk yogurt or sour cream
1. Sift together the flour, baking powder and baking soda, set aside.
2. Cream the butter, sugar, honey, cinnamon and salt until pale and fluffy.
3. Add bananas and vanilla, beat on medium speed until the mixture looks "broken" or lumpy. The bananas should be mashed, with a few small chunks remaining.
4. Beat in the egg until incorporated. Fold in the flour and stir in the yogurt until the batter has only a few remaining white streaks. Be sure to avoid overmixing.
5. Transfer batter into a grease pan and bake for 45min at 180degC.
Friday, 10 July 2009
Cream Scones
The first time I came across scones was during my Home Economics lesson. The entire class except for one girl, got a good scolding because we did not lift the flour high enough to allow air be incorporated, resulting in batches of flattened biscuits. In the end, we had to do it all over again (we didnt enjoy cooking then).
Many years later, I had my real taste of scones at Tea Room (now no longer exist) a coffee shop in the previous Westin Hotel. It was nothing unusual and definitely did not leave a deep impression. What changes my mind was after I had some really good ones at Perth, served with generous portion of clotted cream and homemade strawberry jam, it was sensational.
Fast forward, I had some real good scones during my recent visit to Bukit Frasers (scones was the last thing to expect) and that prompted me to make some at home. I sieved through all the scones recipe at home but in the end decided to try out this particular one simply because the author had put in so much thoughts and hardwork into her research! 
How did it turn out? Perfect if eaten fresh from oven, its a pity I did not have any clotted cream nor jam at home. But it has been a good boost to my confidence, at least, if I met my Home Economics teacher, Mrs Kan again, I can proudly tell her, yes, I can make scones! Lol.
Thursday, 2 July 2009
low fat orange yogurt cake
During my recent visit to Bukit Fraser, we dropped by Ye Olde Smokehouse for a lazy afternoon tea, not knowing what else to do in a cold wet afternoon up in the mountains. Our tea came with a slice of homemade orange cake, a very plain slice but crazily delicious. It was buttery yet it fluffy and very light, so good that we tried to ask for the recipe but of course, they do not entertain such ridiculous request.
When I came back, I started to scout for similar orange cake recipes and I managed to see one at Happy Home Baking's blog and decided to give it a try. The recipe uses yogurt, which reminds me of Sri's Lemon Yogurt Cake, another recipe that I've bookmarked, actually both recipes are rather similar.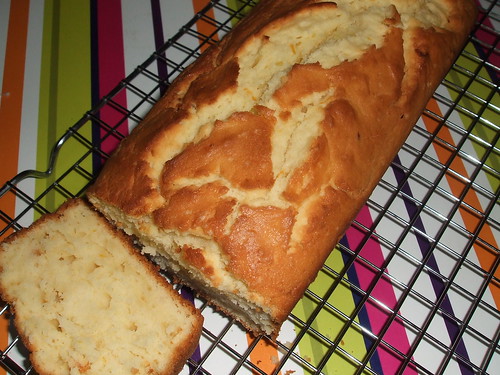
Tastewise, this is a little richer and denser, I suspect it is the yogurt since the amount of butter used is very little. Nevertheless I still like it because it is super moist and I think I'll try this recipe with passionfruit next. This cake is really good with a cup of Earl Grey.
Monday, 8 June 2009
pretzels

I have been wanting to do pretzels, for a long time, after eating the cinnamon sugar coated lovelies from Aunt Anne. I have been searching around for a recipe closed to Aunt Anne's and I found this with numerous pages of good reviews from Imperial Kitchen. Those ladies there are wonder homebakers, so many can't be wrong.
The recipe calls for simple ingredients, readily available at home. It didnt take me long to prepare the dough and perhaps due to the large ratio of yeast used, the dough rised pretty fast. The most challenging part, which I initially thought, was dipping the twisted pretzels into the soda bath. I had imagine a gluey messy batch of shapeless dough but my surprise, it was almost effortless. I did it almost as swift as the workers from AA (hehe). The difficult part was actually shaping them, it wasn't easy, to me.
As for the taste, it is soft like AA but I think they didn't only use melted butter to coat the cinnamon sugar. I remember tasting caramel, maybe next time. I'm happy with these for breakfast today.
Pretzels
1 1/4 cup warm water (start with 1 cup for Singapore's climate)
1 tbsp + 1/4 tsp yeast
3 3/4 cup all purpose flour
3/4 cup + 2 tbsp powdered sugar
1 1/2 tsp salt
2 tsp vegetable oil
Bath
4 cups warm water
1/4 baking soda (or 4 tbsp)
1. Activate the yeast in 1 cup warm water
2. Mix all the ingredients and knead until you get a soft dough
3. Cover the dough with clingwrap and leave it prove until double its size
4. Divide the dough into 10 portions
5. Roll each dough into long strips and form into pretzels
6. Dip each pretzel into the soda bath, quickly dry it on a piece of kitchen towel
7. Place them on a greased baking sheet and bake for 8 - 10min at 220deg preheated oven
8. Brush the baked pretzels with melt butter and coat with cinnamon sugar
Sunday, 26 April 2009
whipping cream buns - again
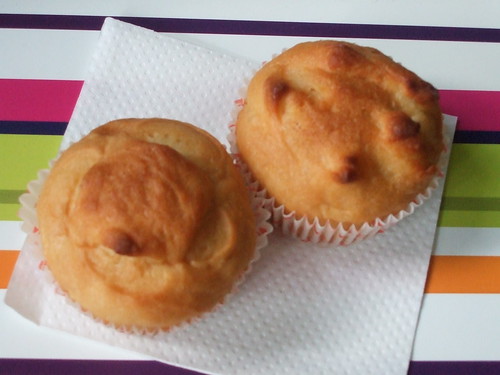
The Dplus Hokkaido Cream bread inspires me so much that I went ahead to fix my own whiping cream bread using the previous recipe again yesterday. I really don't quite like to work with a greasy dough but the result was great, my buns turned out rich and chewy.
There is not shortcuts to good breads (I cheated the last time), so yesterday, I made sure I gave it a good 250 slams against my tabletop, sufficient time to rise and rest in my fridge. I am pleased with the results and when I ate one for breakfast this morning, it was still soft *yay*
I have increased the amount of sugar slightly so I that can eat it on its own. The original recipe calls for 40g sugar and to me, it was kind of bland or perhaps, will taste better with butter and marmalade spreads.
Whipping Cream Bread
300g bread flour
7g dried yeast
3g salt
50g sugar
225ml whipping cream
60ml water
Somehow, unintentionally, my cute little buns reminded me of udders..mooo..
Thursday, 23 April 2009
whipping cream bread

Baking bread takes alot of planning and effort. A lot of planning because breads really take a long time to prepare, from the inital stage of kneading until they are ready to be sent into the oven. The timing, hence, is very important. I usually knead my dough after 10pm and let it rise overnight. For my dough to rise within an hour or two, I need external assistance, like sitting my bowl over hot water or leaving it in a warm oven.
I saw this recipe from dailydelicious and I remember one of the memebers in the parenting forum I visit, mentioned that it is super nice, so with some planning calculated, I started on the dough on Sunday night. This recipe does not require any eggs or butter but instead, 225ml of whipping cream. Being a novice breadmaker, I was surprised how oily whipping cream is! The dough felt like a chinese oil dough, my hands were covered with a film of oil. No wonder the recipe requires the dough to be kept overnight in the refrigerator.
When I shaped the dough the next morning, I can still feel the oiliness so I had to make swift movements to prevent the dough from melting. While I let the dough do its 2nd stage proofing, I made a quick trip to the airport to pick up my sister coming back from HK. However, halfway through we received news that my youngest sister, in labour then, was about to birth, we detoured to the hospital. I did not factor in this and hence, my breads were over proven.
I didnt think this bread is anything more fabulous than my 65C bread. Maybe because of the little mishap at the end. I dare say I might not attempt this recipe again because the whipping cream is way too oily and fattening.
Anyway, my sister gave birth to her second child, little Freja yesterday evening. Such a lovely little bundle. Maybe I should bake some Swedish Semlor to celebrate her arrival.
Wednesday, 22 April 2009
fine butter cake
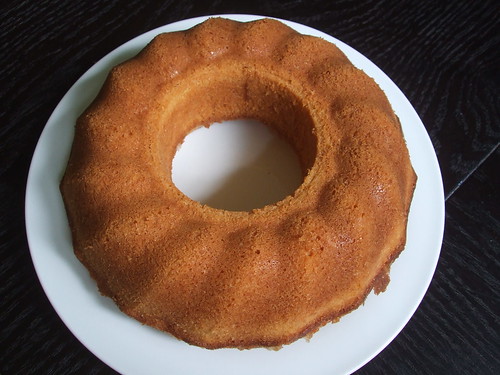
I saw this on Florence's blog and since she named it Fine Butter Cake, it must be good! So how can I not give it a try then. As it turns out, it is really good, how good is good, I guess it is subjective but if my family is not rejecting it, then I'll take it as good.
As compared to the famous butter cake recipe shared by Lee Lee, this one is not as fluffy, hence more dense. Both are different in their own ways.
Fine Butter Cake
150g good quality butter (I use Golden Churn)
1 tbsp corn oil/olive oil
110g castor sugar
1/3 tsp salt
1/2 tsp vanilla essence
3 eggs
140g cake flour
40g corn flour
1/3 tsp baking powder
3 tbsp whipping cream
1. Cream the butter, sugar and corn oil until white and fluffy
2. Add in salt and vanilla essense
3. Beat in the eggs, one by one
4. Sift the cake flour, corn flour and baking powder before folding in into the butter mixture
5. Stir in the whipping cream
6. Bake in a preheated oven @ 180degC for 35 min
Friday, 17 April 2009
chocolate cupcake

E made a latest entry on moist chocolate cake, when I saw the words moist and chocolate, I have this urge to bake it immediately. So I started working on it right after dinner.
The method is quite different from the usual creaming of butter and sugar. This one involves melting the butter with water. And because H was helping me, I sifted the flour and cocoa powder together when I was supposed to whisk the cocoa powder into my melted butter. Anyway, other than this little mishap, everything went smoothly.
This chocolate cake is really good, super moist and soft even after overnight. This recipe is definitely a keeper. Thanks E!
Moist Chocolate Cupcake
150g unsalted butter
1/2 tsp salt
150ml water
35g cocoa powder
170g cake flour
2 tsp baking powder
180g castor sugar (E uses 200g, I scaled down)
2 eggs
1 tsp vanilla essence
1. Preheat oven @ 180degC
2. Combine butter, salt and water in a saucepan and heat it under low fire until the butter melts, almost reaching boiling point
3. Add in cocoa powder and whisk till smooth
4. Let it cool complete before adding in eggs and vanilla essence and give it a good whisk
5. Sift the flour and baking powder, stir in the sugar
6. Fold the flour/sugar into the cocoa mixture and beat till smooth
7. Pour into prepared muffin cases and bake for 20-25min or until the skewer comes out clean
Sunday, 12 April 2009
hummingbird cake

The first time I bought a hummingbird cake, I had no idea what it was; I thought it was just a fanciful name for a cake-like donut. However, they turned out to be the kind of cakes I love, dense and flavorful.
I followed R's recipe and voila, it does resemble the ones I bought at Pop Doh and making them is so easy! I'm now tempted to get myself some donut trays so that I can have cute little donut shaped cakes instead of a big bundt ring now.
Hummingbird Cake
140g cake flour
2 tsp baking powder
1/8 tsp bicarbonate soda
1/2 tsp grond cinnamon
1 egg
70g castor sugar
1/2 tsp vanilla essence
1/8 tsp salt
40g corn oil
130g mashed bananas
80g crushed canned pinapples
20g pineapple syrup
50g walnuts/pecans
First you whisk the egg until it is pale and fluffy, then you add in the sugar, vanilla, salt and oil, giving it a good beat.
Add in the bananas, pineapple, syrup and nuts into the egg mixture.
Fold in the dry sifted ingredients (flour, soda, baking powder, cinnamon) and baked in a preheated oven at 170deg C for 15 min or until a skewer comes out clean.
Friday, 3 April 2009
condensed milk pound cake
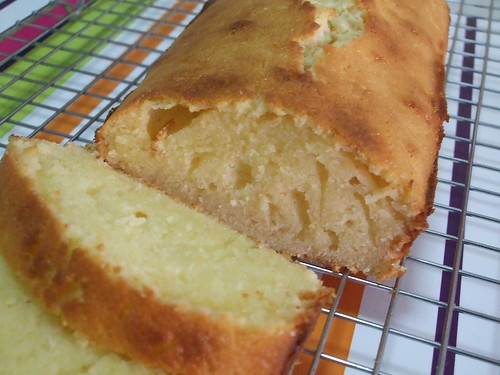
Now that my baking mojo is somewhat back, I am eager to try out some recipes I've bookmarked earlier. My second sis Y, loves butter cake and since she will be making a trip back later this month, I have to prepare a good butter/pound cake for her. For me, frosted do nothing for me, I prefer those simple dense and flavoursome loaves. So when I saw this cake in E's blog, I knew I have to try.
The cake turns out to be soft, moist and smells wonderful, partly because of the condensed milk. But I felt it was a little too sweet for my liking and I will have to scale down on the sugar. However, it is a very small loaf (or should I say short), I will have to double the recipe, or probably follow R's recommendation.
Compared to the usual butter cake I bake, I like this better and Y, you are going to have this when you come back from HK this month.
Oh, this cake keeps well and taste good too when it is chilled.
Condensed Milk Pound Cake
Bake at 170degC for 1 hour
120g butter
45g sugar
1/4 tsp salt
1.5 tsp vanilla essense
1/2 cup condensed milk
120g cake flour
3/4 tsp baking powder
2 eggs
Yields a 8 x 1.5" loaf
Monday, 16 March 2009
cocktail bun 鸡尾包
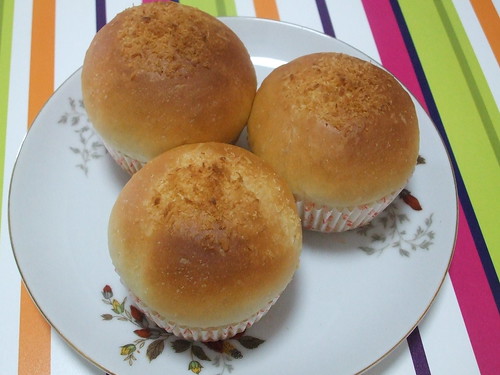
I made these on Sunday, actually, I prepared the 汤种 dough on Saturday night, left it to proof overnight before shaping and baking them on Sunday morning. There has been a rave over this water roux dough in one of the baking forums I visit and according to the experts, this method yields a super soft and fluffy texture, like what you can get from the Japanese bakeries. They were not exeggerating, my buns were so soft and so fluffy that we could not resist the temptation and ate them while they were still hot.
As usual, I keep some for the next day, to see how long the softness can last. This morning, I ate one, it is still soft but not as light as I hope. Perhaps more slamming helps?? Lol.
I'm posting the recipe here, for jq, specially.
汤种 (water roux) Bread Dough
Water roux dough
25g bread flour
125ml water (ratio is 1:5)
Stir the bread flour into the water and heat them up in a saucepan, over light medium fire, constantly stirring the batter with a whisk. You should stop when it reaches 65 deg but since I didnt have a kitchen thermometer, I followed the instructions here.
Main dough
375g bread flour
100g plain flour
35g milk powder
75g castor sugar
3/4 tsp salt
2 1/2 tsp instant yeast
1 egg, lightly beaten
150ml lukewarm water
40g butter
Prepare the bread dough by incorporating the water roux dough into the main dough.
The filling
100g soften butter
45g plain flour, sifted
50g milk powder, sifted
45g castor sugar
20g dessicated coconut
Mix the stir all the ingredients together. I leave it in the fridge so that it is easier to handle.
Monday, 9 February 2009
CNY bakes
No no, I didnt not attempt any cookies or whatsoever for the festive season, it was just too much work and practically impossible to spend hours in the kitchen without disturbance from the two babies.
I did, however, tried Sri's Honey Pound Cake as I am a sucker for pound cakes, especially SaraLee's. I can eat the whole bar if no one stopped me. I must admit, this comes quite close or even better than SaraLee's especially when it is chilled. However, I must remember to lower the oven temperature since I am using a nonstick bakeware, see the dark crust?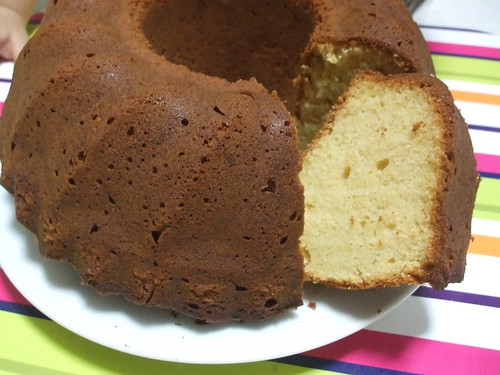
I also made a red bean nian gao for CNY. This is the second time I tried making red bean nian gao, but like my first, it was not firm enough after steaming. I'm still trying to figure why, did I not steam enough? This time, I used a different recipe that calls for glutinous flour instead of tai 太白粉 the last time. 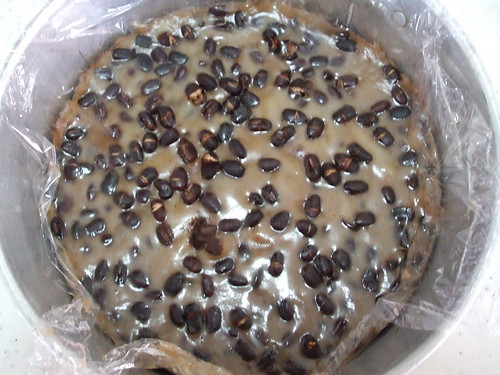
I'll just leave the recipe here, so that any one can comment and let me know what went wrong.
Red Bean Nian Gao
200g Glutinous Flour
250g Cooked Red Beans
180ml Coconut Milk
150g Brown Sugar
Heat up the coconut milk until it bubbles, turn off the heat and stir in the sugar, and make sure it dissolves.
Leave it to cool down before stirring in the glutinous flour and finally red beans.
The mixture should be thick and gluey.
Pour the mixture into a baking tin lined with cellophane paper (optional) and steam over high heat for 1 hour.
Test for doneness but sticking in a skewer, it should come out clean.
Cool before cutting.
Friday, 15 August 2008
chocolate chips cookies

There must have been 1001 chocolate chips cookies recipes out there, all claiming to be the best, the most chewy, the most favourite but really, you have to try for yourself which works for you. So far, I have not found any, that is close to what Arnotts used to make and sell in bags at the supermarket. I could finish that entire bag in one go and that also accounted for what I am today.
Back to my chocolate chips cookies, the recipe I tried last night was extracted from this blog. How can I not give it a try when the blogowner is, obviously a chocolate chip cookies lover herself, just look at her numerous entries on chocolate chip cookies, in all format and styles (she even attempted to bake some in her car on a hot summer day).
So I went on to bake, and because the recipe is really simple, I was done within 30 minutes. My first tray didnt turn out too well, actually my fault, I stepped away from the kitchen to install a game for T, so the bottom was a little burnt. The second tray was perfect and boy, they go very well with a cup of hot tea, rather similar to the little cookie accompanying the hot cuppas at Coffee Club. Nice!
Wednesday, 6 August 2008
cold soba salad
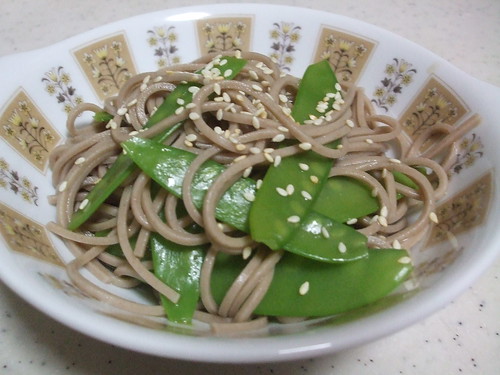
While lunching with S at Toast yesterday, my eyes sank into their bowl of soba salad, such a healthy and wholesome meal, good for people on diet.
My cheater's way of making this soba is really to blanch a packet of snow peas, cook a bunch of soba, mix them with zaru soba sauce and finally garnish with toasted sesame seeds. I don't think Toast made them this way and I'm still curious about their dressing (they make really good salad dressings, I can eat there everyday if my purse allows), I will do a CSI, one of these days. Psst - S, when shall we go again??
Monday, 24 March 2008
homemade pizza
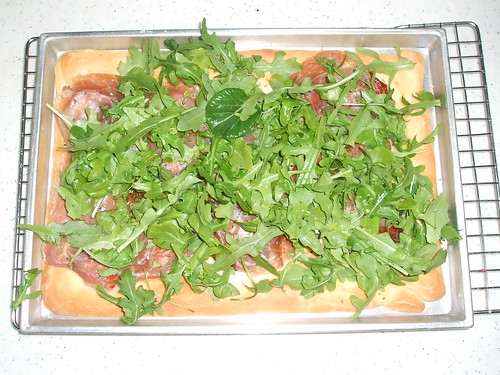
With the rapid rising cost of living, we make a point to eat home more on weekends. To keep us from temptations, we try to do something different every week. Last saturday, it was pizza night. I tried out Ali's recipe for the crust and everything else was bought from Cold Storage Gourmet, still worked out to be cheaper than eating at Modesto's and alot more fun too.
We made two versions, the standard tomato based salami, ham, mushrooms and mozerella cheese and a olive oil based with proscuitto ham and rocket leaves. For the latter, we baked the crust kosong and layered the hams and leaves when the crust is done. Both were good, and I realised, you mustn't stinge on the ingredients, get the freshest possible and even so, it is still more economical than dialing for deliveries.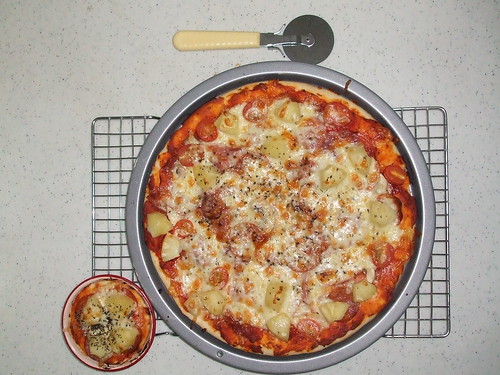
See the little pizza? It's made by T, he had alot of fun doing this but my mom was frowning over the mess we created in the kitchen.
Ali's Pizza Dough
3 cups plain flour
1 sachet active dry yeast
1 cup warm water
1 tbsp sugar
1 tsp salt
Saturday, 23 February 2008
Ddeokbboki - Spicy Korean rice cakes
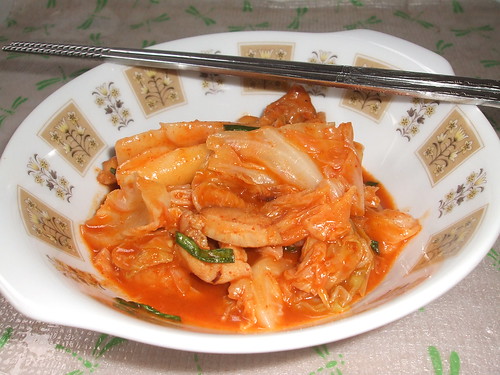
This is the second time I attempted this simple korean dish and maybe because the rice cakes are of better quality, it turned out really chewy and spicy. Even hubs who doesn't fancy such snacks took more than one bite.
The first time I made this dish, I used the frozen rice cakes bought from the korean mart at Cineleisure, it was rather hard despite me simmering them for quite a while. This time round, it was my cousin who got me the rice cakes from another korean mart in south bridge road (a few steps away from Fook Oon). From its simple packaging (those plastic boxes use by confectionaries) it looks like something homemade rather than mass produced from factories, perhaps thats why it tastes so much better?
I make it really simple as I do not have corn syrup and all the other special ingredients required by the authentic recipe. If you really are interested, this is how I made mine:
Ddeokbokki
1 box of korean rice cakes
1 ball of beijing cabbage
1 boneless chicken thigh meat
2 large tbsp of gochujiang
1 tbsp of sugar
water
spring onion, cut into inch length
Method
1. Cut the chicken meat into strips and marinate with soy sauce and pepper
2. Cut the cabbage into bite size
3. Heat some oil in frying pan, brown the chicken, remove from pan
4. Fry the cabbage, add some water to simmer until cabbage is soft
5. Add the gochujiang
6. Add the chicken and rice cakes, more water if needed
7. Add some sugar and do a taste test
8. Simmer for a while more before thickening it with corn starch
9. Stir in the spring onion
10. Voila, done!
我真的很喜欢这种韩式辣炒年糕, 多吃也不腻, 只会发胖罢了. Lol.
Wednesday, 13 February 2008
claypot rice

Sis brought back some lap cheong (chinese sauages) from HK and we decided to have sar bo fan on the 3rd day of CNY. This is the first time I'm cooking claypot rice in a claypot, usually, for convenience sake, we do it in our rice cooker. I wish I can figure out how to get the sides to be burnt, perhaps I need to use a bigger stove so that the flames can reach the sides of the pot instead of just under??
This is how I did my sar bo fan, if you are interested.
Recipe
2.5 cups of rice
2 deboned chicken thighs (seasoned with soy sauce and pepper)
2 lap cheong, sliced
1 yun cheong, sliced (this is made of liver)
some roasted pork
2 thumb sized dried salted fish, diced
oil and dark soy sauce for seasoning
Method
Wash and cook the rice together with dried salted fish until you see small bubbles.
Add in the chicken and let it simmer until the rice and chicken is almost done. Sprinkle water over the rice if needed.
Add in the lap cheongs and roasted pork and simmer until rice is cook and you get that burnt smell.
Do not attempt to stir the rice at any point, I like my rice to stick to the pot in order to get them burnt.
Just before serving, mix generous amount of dark soy sauce and very little oil if you needed.
Taadam...chow time.