This cake brings back lots of 'exciting' memeories, which I will fondly cherish.
I learned this cake from a bakng class organised by Bt Batok Community Club many years back. Mdm Law, the instructor made it looked so easy and I had very little difficulty replicating it at home. Fast forward a few years later, I shared this recipe with some mommies in a parenting forum I frequent. This was my greatest 'mistake' made. Many of them attempted this recipe on a same Saturday night, my handphone rang non stop. Everyone encountered different problems, one said the kaya didn't thicken, another one reported that her cake broke into half when when she poured the kaya over. I wasn't expecting so many different outcomes and I really didn't know how to reply or solve their problems. Everyone was simultaneously reporting their results on the forum, like as if they are waiting their newborns to arrive. Funny yet stressful for me.
I'll still share the recipe here for those to want to try. I can only say, please do not pour the kaya over the cake when it (the cake) is still hot, it will break, no matter how careful you are. You may use your favourite sponge cake recipe instead.
pandan kaya cake
(this recipe is for 2 x 7" cake tin)
345g Optima flour (from Bake King)
2.1 tsp ovalette (stabilizer)
25oz water
6 eggs
2 tsp pandan paste (indonesian butterfly brand)
85g melted butter
1. Beat the flour with eggs until it thickens and pass the ribbon test.
2. Add in the ovalette and water and beat well.
3. Add in the pandan paste, make sure it is well mixed.
4. Add the melted butter and mix well.
5. Pour into 2 seven inch lined cake tin and baked at 180deg for 35 min.
Prepare the kaya after the cake is done and slightly cooled.
570ml water
200ml coconut milk
170g sugar
Half a packet of hoon kueh powder
1 tsp gelatine
1 tsp pandan paste
1. Stir all the ingredients together and boil over low heat.
2. Keep stirring until the mixture thickens.
3. Let the kaya cool slightly before icing the cake.
To assembly the cake.
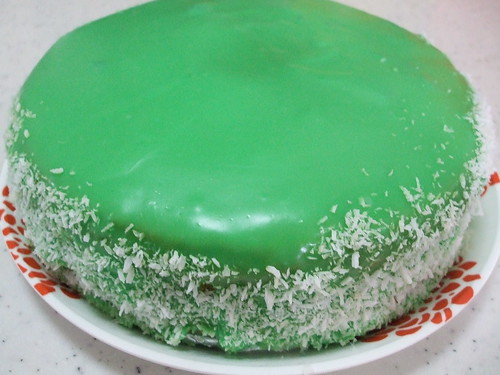
Cut the cake across horizontally and sandwich the cake with a layer of kaya. Scoop some kaya into a measuring cup or any container with a beak. Slowly pour the kaya over the centre of the cake, with the back of a soup ladle, move in circular motion to spread the kaya and let it drip over the sides naturally. There will be quite a bit of wastage in order for the sides to be covered up evenly.
You can dust some dessicated coconuts on the sides to cover up any 'flaws'. I do that as my frosting skills is extremely lousy.
Let's hope nobody is seriously interested enough to try the recipe out. Some people suggested adding jelly powder into the kaya so that it will set easily. Personally, I feel, if jelly is used instead of hoon kueh powder, the bite will be very different, I don't want my kaya to taste 'hardened'.
Try at your own risk. Keke
Sunday, 6 September 2009
pandan kaya cake
![]()
Subscribe to:
Post Comments (Atom)

9 comments:
Hi Karen, I've always wanted to make a pandan kaya cake but still haven't pluck up enough courage to do so. Your cake looks good! Reena
Reena, you should since you are an expert yourself! Btw, the real thing is not as green, its my camera. Lol.
I am Annie, i was one of them with the "newborn" couple of years back. LOL. Yes, it does bring back fond memories, i read the post with a smile on my face.
I'm no expert, I'm still learning too. I just finished baking a pandan chiffon cake, still thinking if I should do the kaya layer... Will keep you posted if I do make it ;-) Reena
Just mins ago I was still thinking if I should make this. And yes, I decided to and just done layering the cake. I didn't have hoon kueh powder so I used Mngzara's recipe but modified to use agar agar powder. Super messy with the layering. Think I'll use a cake ring next time or do it in the pan upside down method. Will update blog when I have time.
Annie, remember our baking sessions?? Keke
Reena, can't wait to see your version!
of cos' i do and i remember u set yr oven to "grill" instead of bake at that time. bahwhahahaha
Wahh...so malu!! Hahaha...but we learn from mistakes. Lol
Karen,
I've just updated my blog. Do check out pics there.
Post a Comment